Monday, April 1, 2013

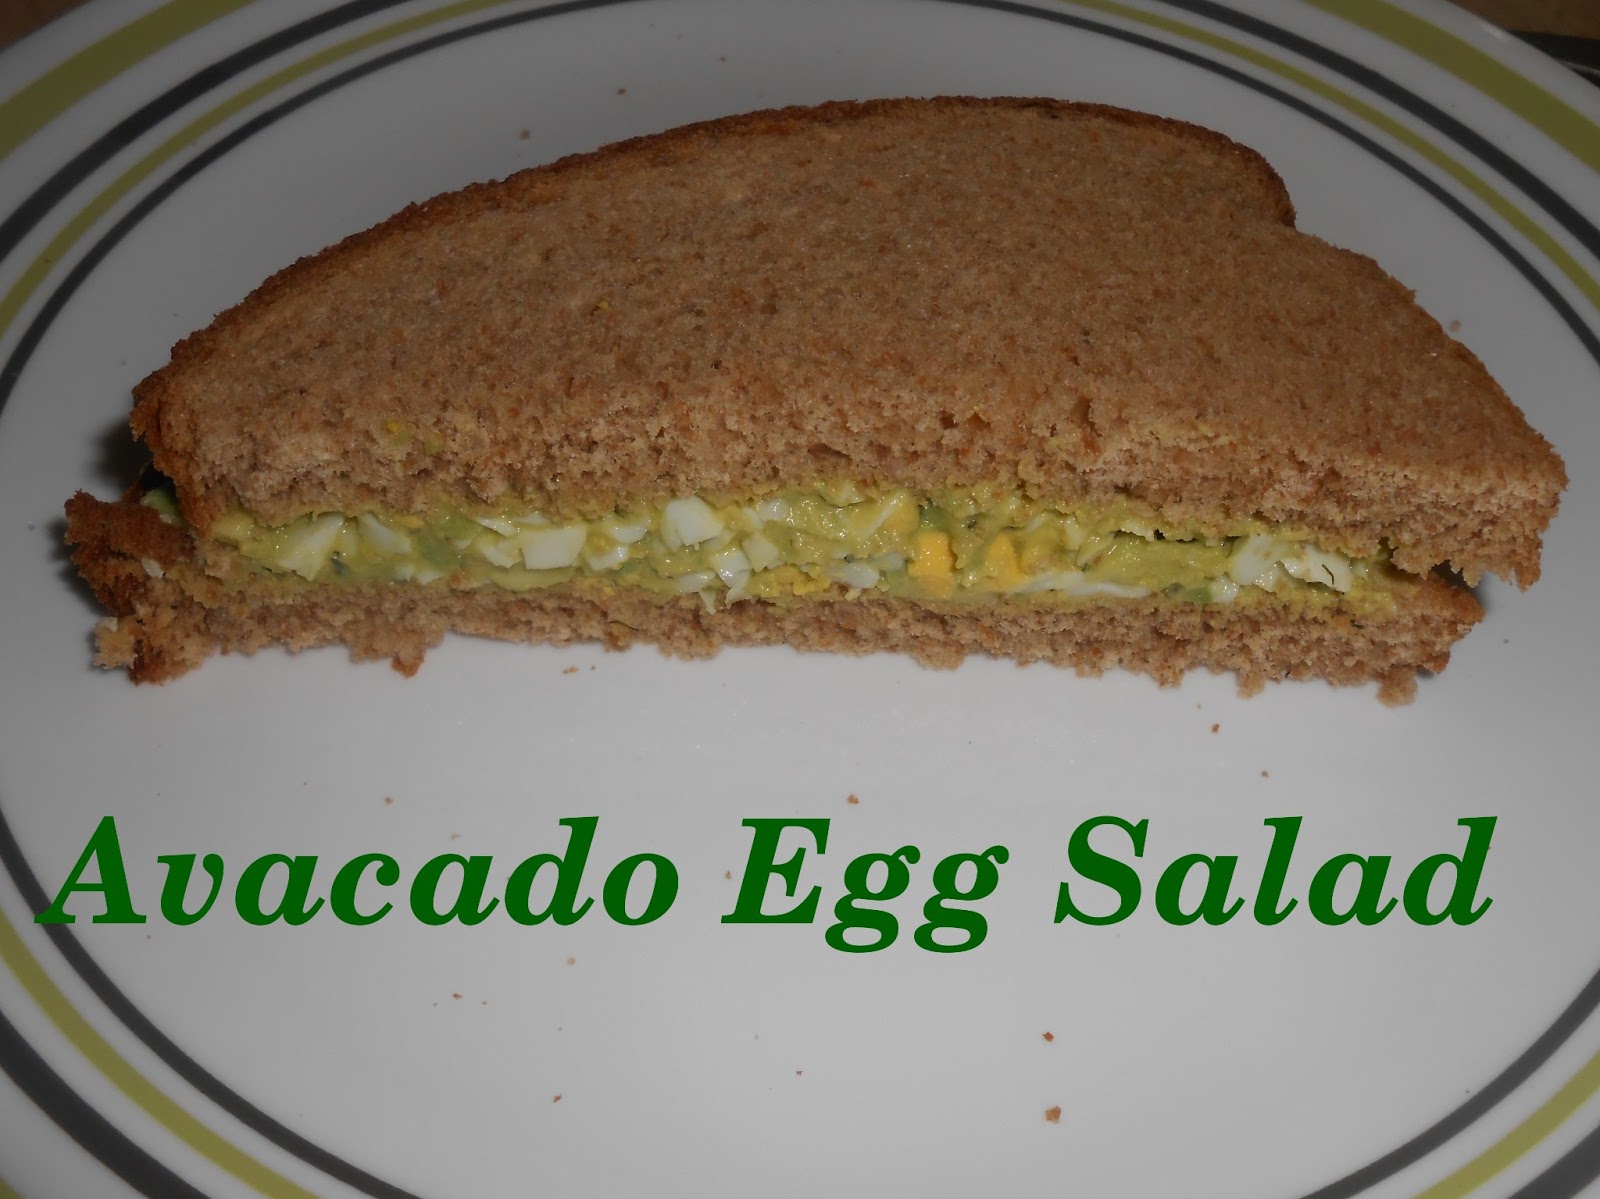
Avocado Egg Salad Sandwich's


My last post I showed you how to hard-bake eggs, not boil. And as I promised, here is how to make my favorite sandwich after making hard boiled (baked this time around) eggs. Now before I start I want to tell you that I don't like egg salad, but adding the avocado really changes thing up, and make it eatable! This recipe is great if you love pickely/vinegary things. Even if you don't love that flavor as much I really suggest you try it. You won't regret this yummy sandwich!


Ingredients: (makes about 3-4 sandwich's depending on how much you stuff your bread)
1 avocado- I love the avocado so I add more because it's the best! 
3 hard boiled eggs - click here to see how I baked mine! (Don't you love the colored eggs too? :) )
1 tsp dijon mustard
1 tbs apple cider vinegar (1 1/2 tbs for me)
1/4 tsp dill weed (I put a bit more in)
1/4 tsp garlic powder
1/4 tsp salt
Dash of parsley flakes

How to:
  • Get your 3 eggs and cut them up into small pieces.
  • Take your avocado and mash it up with a fork


  • Combine all of your ingredients with the egg.

I shouldn't of used a green bowl! 

You're done! Super easy sandwich, super delicious, and super healthy! :) I hope you enjoy this as much as I do! 


Friday, March 29, 2013

OVEN HARD BOILED EGGS!

Okay, so you may be thinking how do you hard boil eggs in the oven, well you don't. I just don't know how to say it. You put eggs in the oven and they turn out like a hard boiled egg, but ten times easier and you won't have to wonder if your eggs are too overdone or underdone. The yolk is perfect yellow and no green ring. They seriously come out perfect!  It is so easy and great just before Easter!

I've seen this going around on Facebook and Pinterest and HAD to give it a shot. I am very pleased I did it. They turned out great, and it is a lot easier then boiling them!

Step one:
-Preheat your oven to 325 degrees
-Get your eggs and on put them on a cookie sheet, cake pan, or muffin tin. 
-Put them in the oven for 30 minutes. (It is a perfect time for them!)
Step 2: 
-Take your eggs out. If they happen to have brown speckled spots like mine, don't worry, they come off! I am not sure why they had brown spots. Maybe from a dirty oven? If so, I need to clean mine! 


Step 3:
-Soak your eggs in ice water for about ten minutes


You're done! Easy as that! We dyed the eggs, but the next day I used 3 eggs to make avocado egg salad sandwich's, which are delicious! Yummm. That post will be for another day! 

Happy Easter!! I hope this makes your Easter egg dying a lot easier! 

Tuesday, March 26, 2013

Annie is 9 months old!

I can't believe it! Annie is 9 months old already, oh how the time FLIES by! She has grown so much and she learns new things everyday! She is a pretty smart cookie. Here is a great story about her.

The other day I was showering in our bathroom in the bedroom. Annie was asleep int the front room. I get out only to hear her screaming crying. I picked her up, looked at her and told her that if she ever sees that I am not in the living room, then she can crawl through the kitchen, down the hallway to our bedroom. I didn't think she'd really understand. But it was worth a shot. 

Well today we went to Costco. When we got home I had lots of stuff to take up. And of course everything at Costco is huge, so I could only take 2 things up with me when I took Annie up to the apartment. I gave her some toys and ran out the door hoping she didn't see me. I then tried to army pile everything onto my arms. (It did not work out) I was out there for about 2 minutes, and when I got into the house, Annie was crying but she wasn't in the living room where I left her, she was past the kitchen in the hallway headed to our bedroom!! I was so proud of her for trying to find me. She is so so smart! I am so happy that she is beginning to understand things.   

Here is a picture that shows how she's developed over the 9 months.


I can't believe how much she has grown. I love my little lady! 

Homemade wall art, very unique and easy!

I have seriously been needing something on my bedroom wall, it only has a few picture and so I decided to attempt this wall art decor. It turned out cute, but I wish I would have used a painting instead of a picture like I did. It would have turned out much better if it had been a painting I'm sure. The thing I like about this is that anything can be on your picture and it'll still look awesome, because you can only see bits and pieces of it. Here's mine. It could of turned out better, but I love the jagged letters, it makes it unique, and that's what art is, right? :)

I couldn't get a picture without the glare, but it turned out  okay. Definitely not my best DIY project.

What you need:
  • Second hand store painting or picture, mine was only $3.00 (I did picture and I wish I would have done this with a painting instead!
  • Craft paint
  • Vinyl letters
  • Paint brush

  1. Start out by selecting a quote, scripture, saying, name, anything you can think of. Once I know what you want to put on your picture get your vinyl letters and cute them out. Don't stick them to the painting yet, you will want to get thing organized first. 


I got these at Walmart for $3 in the school supplies area. I will definitely be using these for future projects. Actually my next project involves these as well. Stay tuned, eager one! :)  

Here is how it should look like cut out.

    2.   Next stick the letters on the picture. 

I like this picture because it reminded me of Jamaica, where Jon served his misison. :) He told me it wasn't even close to looking like Jamaica, but I still think it looks like it. 


   3.   Get your craft paint and paint brush and paint the whole picture.


4.   This next step it vital! I really wanted to see what it looked like, but my husband said to do one more coat, so I did, and it was a bad decision. ONLY DO 1 COAT. It will end up looking like this....oh well, I still like it and it give it a feel of real craftsmanship! ;) Don't tell me differently. Haha.


When you're all done hang it up and smile at your accomplishment! 

Now as I said before, mine is not perfect at all, this for sure wasn't one of my most proud of DIY projects. But I love it none the less. Having this saying right by my bathroom in my bedroom is a perfect way to remind me of my MANY MANY BLESSINGS! Happy crafting all! :) 


Saturday, March 23, 2013

Sweet-tart apple slices!

So my last food post was a little high on calories, okay REALLY high on calories! I figured I could maybe redeem myself by doing this post of a healthy, yummy, nutritious snack! Seriously, these apples slices are so yummy, and the kids will love them! I had my brother over today and he finished them off for us. He said they were so good. He asked me how I did it. Well here is the best part of these apples, they only have 3 ingredients! And most likely you'll have them in your home, if you are a fruit lover like me that is. :) I told him and he repeated it, yeah I think he was impressed!

This is going to be a pretty short post because honestly, it's so easy.

What you need:
  •  2-3 sweet apples like Fuji or Gala - you can use tart apples like Granny Smith but this will be sour apple slices instead of sweet-tart apple slices! But if you like sour and no sweet then I recommend it!
  • 1 lemon
  • 1 orange


Grab your apples and slice the super thin. I like them thin because it can soak up more juice. The thick ones don't get soaked very well, and it tastes like a plain ole boring apple slice. Where is the fun in that? You may think that 2 apples isn't enough but if you cut them thin, like me it will be plenty.

Grab your lemon and orange and squeeze the juice out into a bowl. I don't have a squeezer or juicer so I had to do it by hand, but man would a juice squeezer be nice! 
Pour the juice over the apples and set it in the fridge for at least half an hour. The longer it sits the more the apples soak up the juice. 
 Seriously, look how many apple slices I got from just 2 apples! Yeah....alot. :) 


You're done! Enjoy a sudden burst of kick in your mouth. Your taste buds will be thanking you for trying this one! :)

Friday, March 22, 2013

DIY Sunburst Mirror with paint sticks! Less than $2!


Yesterday I was roaming on pinterest and saw this and HAD to do it! It looked so fun and pretty easy, better yet it was SUPER cheap and stinkin adorable! This whole project only cost me......wait for it........$2.14. But that doesn't even count because I bought 2 bottles of paint. But only used about 3/4 of one bottle. So it cost only $1.57!! Wow? I think so. Go to this link here and see how much they sell something like this at Target. Now it doesn't look exactly like this, but I think mine is cuter than Targets. You're saving a lot of money by doing it this way!

To start off your beautiful sunburst mirror you will need the following:
  • Round mirror tile. I bought mine at the dollar store, because I like to save money. The mirror that I got was about 5 inches in diameter. I called Hobby Lobby to see their prices it ranged from $2.99-12.99. They said the $12.99 one was about 12 inches in diameter. The reason I am telling you this is to let you know about how many paint sticks you need to get by going off the size of the mirror. The bigger the mirror, the more sticks.
  • 24 paint sticks for the mirror size I got (5 in.)  (These are usually free) People may wonder why you need so many. Now, let me tell you, the tutorial that I looked at said to use 50!! I went to Walmart and asked the little old man at the paint counter for 50 paint sticks. He looked at me with concern in his little blue eyes, I said it was a craft project I was working on. I even offered to pay for some, I felt like I was robbing Walmart! The little old man went to the paint counter and counted out 50 sticks, I offered to pay again, and he smiled at me and said, this is the only thing in life that's free. I smiled at his kindness, and told him thank-you. He made my day! :)  Sorry for the story. It was just so cute, don't you think?
  • Wire cutter pliers
  • Paint .57 cents at Walmart.
  • Ruler
  • Hot glue gun/glue sticks
Step1:
To start off you'll want to take off these black rubber things on the back of your mirror, if yours has them. You'll probably want to take the sticker off too. I didn't, and I picked up a paint stick after I had glued it on, and it came off because it was glued only to the white sticker part. Learn from my mistakes.


Step 2:
Take half (12 for me) of your paint sticks and cut them with wire cutters. This is where your ruler comes in, I took my ruler and measured 9 inches. I drew a line and that is were I cut it.  It just so happens that I was able to cut them without measuring again. We cut them right at the end of where the divots are. (Actually my husband cut them, he is so wonderful! I am lucky to have him!)
Bad glare, but it should be understandable.

Step 3: 
Take 6 of the ones you just cut and cut the edges of them like so. We weren't planning on this, but we tried to lay the sticks one back of the mirror and they didn't fit. So we cut both edges of the stick, so we could fit them in place. (You may not have to do this step, maybe you can squeeze them all on the back of the mirror without cutting. If you can, GOOD JOB! We couldn't! :) )
 
This is what it should look like.

Step 4:
-Take all of your paint sticks and paint them. Here is a picture of how I painted, it was super easy just to pour it on like this. 

Also, I don't know why I didn't paint the other side with no words, I would of done that now that I think of it. I had to do 2 coats because you could see the words on the first coat. When I painted the 12 sticks I didn't cut, I painted on the other side with no words, I only had to do one coat! Don't forget to paint the sides and tops as well. I would also paint both sides, I didn't and wish I had. 


Step 5:
Once the sticks are dry, lay the 12 ones that you cut on the back of the mirror with the paint side down. This just makes sure that they all fit, and if they don't, then you can cut the edges off more. We did a pattern with the sticks, and went every other one.  That probably doesn't make sense, we went--cut edges, straight, cut edges, straight, etc. Hope that makes sense? Look at the picture for better understanding. (See this is why I wish I would have painted both sides, it's ugly, but nobody see this side, so it's really not necessary!)


Step 6:
-Once everything is in place start hot gluing the sticks onto the back of the mirror. Try to get the sticks across from each other to be in the exact same spot. Your finished project will look more even.

 Flip it around and you have your first layer of the sunburst done!


A few are closer to each other then I wanted, but you really can't tell with the finished project because you put other sticks around it. It already pretty and it's not even done yet!

Step 7:
Flip it back over ( I know you just want to keep it as it is, but it will be even prettier, I promise! ) and start  hot gluing the other 12 sticks that you didn't cut. Put them in the gaps in between the ones you cut.
 I painted a few of both sides, but I wanted to see the finished project so I rushed through it!

Step 8: (LAST STEP!) :D
We were trying to figure of a way to hang it and my husband thought of this, which is brilliant, and a money saver! It's not too pretty, but no one see the back so who cares!? Not me. :) We took a piece from one of the paint sticks we cut and hot glued the ends of the paint sticks on the back and then just hung it with a push pin.


Once you've labored so hard to get your beautiful sunburst mirror for less than $2.00 you can see your finished project, and LOOK how beautiful it is!! I love it. 


It goes great in between my picture of Christ and of the Oquirrh Mountain Temple, where we were sealed! 


I think everyone that comes into my house will make a comment on how beautiful it is. And remember it only cost me under $2.00. Ohhhhhhh Yeahhhh Boyyyy! :)

Thursday, March 21, 2013

Brown Butter Nutella stuffed Chocolate Chip Cookies. (AHHHHH-MAZING!)


You may be wondering what this totally delicious sounding cookie is, what it smells like, and seriously how delicious it truly is?! Let me tell you, once you eat this cookie, you'll NEVER turn back to another cookie recipe. They're just plain divine! I was a little down today and these cookies fixed my mood right up. These cookies are a way to a woman's broken, sad, unhappy, mad, every emotion, heart! I got the recipe from here.  Here is a picture just to start making your mouth water. :)


This is about our 5th time making these, they taste just as good every time! My husband still agrees! 

We had our Relief Society Birthday Party last night and we were suppose to bring our favorite thing, and then someone would be taking our favorite thing home with them. I bet you can't guess what I brought? ;) Some lucky lady got to bring my cookies home. And I'm sure she gobbled them up.


I started out by putting my nutella in the fridge to get stiff. I have tried it both ways and putting it in the fridge is alot easier and cleaner! This is what your finished dough should look like.

I love how you can see the butter on this. Yumm.

Once your dough chills in the fridge for 2 hours take it out! If you keep it in for more then 2 hours it harden too much and then you have to wait for it to thaw a bit. Trust me the first time you make them you'll only be able to last an hour and a half before popping them out and stuffing them with that delicious nutella goodness! Here are step to step pics of how to put nutella in the cookies!

1.


 2.

3.
Don't mind the gross stained pan! It's clean, just stained!
 4.

5.


Here is the recipe! 
Ingredients
  • 2 1/4 cup all-purpose flour
  • 1 1/4 teaspoons baking soda
  • 1/4 teaspoon of salt
  • 2 sticks (1 cup) unsalted butter (this time around I used salted butter because it was all I had. When I use salted butter I don't add any salt into the recipe)
  • 1 1/4 cup packed dark brown sugar
  • 1/4 cup granulated sugar
  • 1 large egg plus 1 egg yolk
  • 1 1/2 teaspoons vanilla extract
  • 1 tablespoon sour cream (or yogurt) But sour cream is all I had in the house. It still tastes good! I promise. It moistens the cookies!
  • 3/4 cup semi-sweet chocolate chips
  • 1 cup milk chocolate chips
  • 1 jar of Nutella, chilled in refrigerator (you won't use the full jar don't worry!)
Instructions
  1. Whisk together the flour, baking soda, and salt in a bowl and set aside. Melt butter in a saucepan over medium heat. The butter will begin to foam. Make sure you whisk consistently during this process. After a couple of minutes, the butter will begin to brown on the bottom of the saucepan; continue to whisk and remove from heat as soon as the butter begins to brown and give off a nutty aroma. Set aside to cool for a few minutes.
  2. With an electric mixer, mix the butter and sugars until thoroughly blended. Beat in the egg, yolk, vanilla, and sour cream until combined. Add the dry ingredients slowly and beat on low-speed just until combined. Gently fold in all of the chocolate chips.
  3. Chill your dough for 2 hours in the refrigerator, or place in freezer for 30 minutes if you are super eager, although I cannot promise the same results if you do this.
  4. Preheat the oven to 350 degrees F. Once dough is chilled measure about 1 1/2 tablespoons of dough and roll into a ball. (Pictures above) Flatten the dough ball very thinly into the palm of your hand. Place 1 teaspoon, (I probably did more, I stuffed them like crazy!) of chilled nutella in the middle and fold dough around it; gently roll into a ball — it doesn’t have to be perfectly rolled! Make sure that the nutella is not seeping out of the dough. Add more dough if necessary. Place dough balls on cookie sheet, 2 inches apart and flatten with your hand VERY gently. (Really only the tops need to be flattened a bit!)
  5. Bake the cookies for about 7-8 minutes or until the edges of the cookies begin to turn golden brown. They will look a bit underdone in the middle, but will continue to cook once out of the oven. Cool the cookies on the sheets at least 2 minutes. Remove the cooled cookies from the baking sheets after a few minutes and transfer to a wire rack to cool completely. Repeat with remaining dough.


I need to work on my food photography, but the still look delish!


 They are so good dipped in milk!


These cookies are so so yummy! You need to go make them right not and see for yourself! Enjoy, you won't regret it!